When researching mass and weighing instruments, you might have noticed the term “traceability” comes up frequently, especially in laboratory and manufacturing. Traceability is used in a wide variety of fields, and the definitions vary accordingly. In this post, we’re going to focus on traceability in metrology, and how it affects the measurement of mass.
What is Metrological Traceability?
According to the Bureau International des Poids et Mesures (BIPM, translated to International Office of Weights and Measures), metrological traceability is the “property of a measurement result whereby the result can be related to a reference through a documented unbroken chain of calibrations, each contributing to the measurement uncertainty”.

What does that mean?
Let’s break down this intimidating word salad.
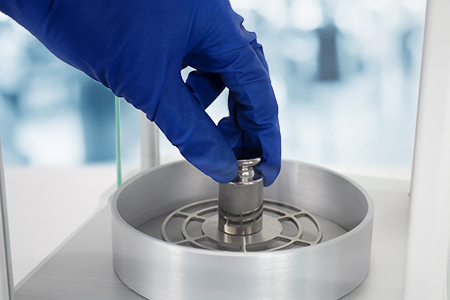
Essentially, whenever something is weighed, people trust that the results will be correct and as close to the true value as possible (or accurate). The reason they can trust the results is because (ideally) the weighing equipment is calibrated frequently to ensure that the balance or scale produces measurements that are precise and accurate.
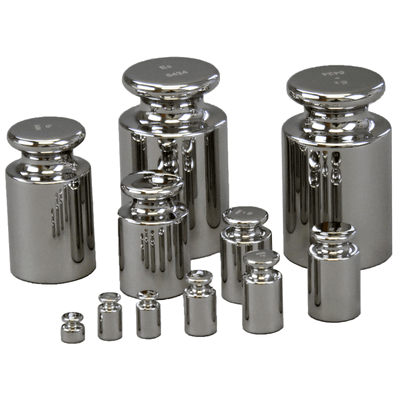
And how do people ensure the are themselves correct? By measuring them and calibrating their equipment. That’s the chain BIPM is talking about in their definition. Calibration weights are like a family tree: each weight can be traced back to a master weight, which in turn is calibrated against another weight all the way back to a standard of reference closest to the true value. It used to be le Grand K, held in a vault in France. Now, the value is based on a calculation that was found by refining Planck’s constant.
Small errors can add up to big ones if they’re used long enough, and that’s true in math problems and supply chains. That’s why everything in the calibration process is documented: if there’s a mistake somewhere along the way, people can trace the error back to its source. It also helps find out how many links in the chain were affected.
Let’s say there’s a mistake during calibration, so an analytical balance is off by a couple of milligrams. That may not seem like much, but suddenly all the measurements produced by that balance will be off by that much. The compounds that were measured then are used in formulation mixtures. Now all these mixtures are wrong themselves. That could lead to a failed clinical trial or unexpected results in a study. Or worse, if an instrument is used to calibrated calibration masses that are standards, all the instruments calibrated using that reference are inaccurate themselves and the error spreads throughout the organization. That could be a lot of instruments to check before finding where the error started. However, with traceability, all the calibrations were documented. That means that all calibrations can be traced to a standard, and that we can check which instruments were affected by inaccurate standards simply by referring to the documents.

Why is metrological traceability important?
We need metrological traceability for a few reasons. First, as we mentioned above, it ensures that errors can be tracked back to their source. It also helps ensure the integrity of the data across the chain, and how trustworthy it is. Whether a lab or a factory is getting data from the next town or from a different continent, they need assurance that the data is reliable and that measurements are correct in order to produce anything from environmental analysis to medical compounds.
If the measurements and the instruments that produce them are not traceable, they lose credibility and they are not useful for the global community. That can have far reaching consequences. Imagine if a study commissioned by the government had untraceable measurements! Or different laboratories measuring the same thing and all obtaining different results depending on their location. How would we know which ones are wrong and which ones are correct?
Studies, models and analysis are performed in different countries to detect global patterns or simply shared to make existing models more accurate. Metrological traceability ensures the integrity of these measurements and proves that the data can be used with confidence no matter where it’s from.

How is metrological traceability enforced?
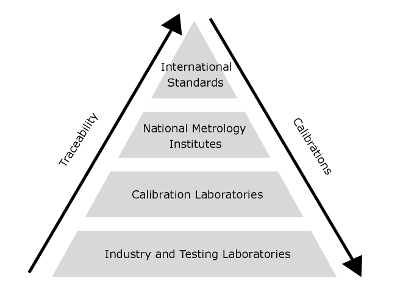
Field instruments are calibrated by authorized accredited regional laboratories. These laboratories are accredited and verified by national organizations like National Metrology Institutes. In turn, national organizations are themselves checked by international organizations that use internationally accepted references and standards like the International System of Units. The processes are all documented according to strict regulations, so a history is created and can be verified. This hierarchy helps ensure that standards of reference are enforced and stay the same no matter where the measurements are performed. There are more layers than that (for example, an organization can have their own standards that they must adhere too) but you can think of it like a pyramid, with the true value on top and layers from a national organization under, accredited regional labs below and organizational standards below that, with the instruments used at the bottom. It’s also represented as a vertical chain, with each organization being a link.

What are some requirements for metrological traceability?
A major component of metrological traceability is an unbroken chain of calibrations. That means that every instrument and standard of reference is calibrated throughout the chain (or pyramid) without missing a step.
Documentation is paramount. It proves that the instruments were calibrated, where, by whom, how long ago, and much more. If errors or audits happen, they’re a good way to look at the whole process to find out what went wrong or whether the process works correctly.
It’s also important for calibration to be conducted frequently and in a timely manner. After some time, weighing instruments can drift from the calibration value , so it’s important to do it at regular intervals to keep checking that the instruments are still giving correct readings.
Measurement uncertainty must be included throughout the process, in each and every step, for every calibration. Measurement uncertainty is not the same as an error; rather, it’s the range of possible values in which the true value is situated. Despite all our scientific knowledge, we’re hardly ever 100% sure that we know the exact true value of a measurement. Measurement uncertainty is a way to show how confident we are that the measurement falls within the correct range. It’s not just used in metrology, but across various scientific and mathematical disciplines, from physics to accounting. If the measurement uncertainty is too high, the instrument must be recalibrated.
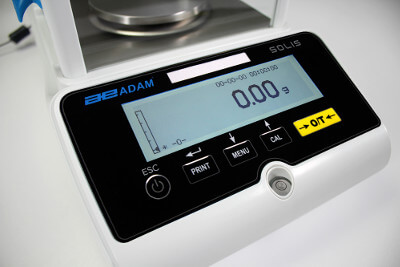
Adam Equipment creates products in accordance with metrological guidelines from various national and international organizations. Learn more about Adam compliance with metrological regulations here. Our lab balances are compliant with GLP and ISO guidelines. approved scales have approval from authorized national programs like NTEP, OIML, EC-Type, NCRS, NMI and Measurement Canada. Be careful: approval and traceability are not the same thing. Approval denotes that a balance be legally used to sell goods by weight. To be traceable, a balance or scale must have been calibrated by reference weights that can be traced back in order to prove that the balance is accurate. A balance or scale can be traceable regardless of approval.

